How do Outlook Folders Work
Outlook folders are a way to organize and categorize your emails based on a set category or grouping criteria. This can be really useful for scoping outlook inbox search and cleaning up your general inbox.
Where folders really come in is when working a job which is client based. People who work at a company for external stakeholders or freelancers can use this technique to sort their folders based on the project name or associated client.
Outlook and many other email clients come with default folders such as: Inbox, Sent Items, Drafts, etc.
What are Rules Used For?
From Microsoft’s official documentation, outlook rules are “An action that Outlook automatically performs on sent or received email messages, based on conditions you specify, such as moving all messages from a specific person into a folder other than your Inbox”.
In other words, we can set a series of operations to run when an email is received or sent, and in this case this will be moving the email to the corresponding folder based on the project by parsing the emails subject or content.
Implementing the System
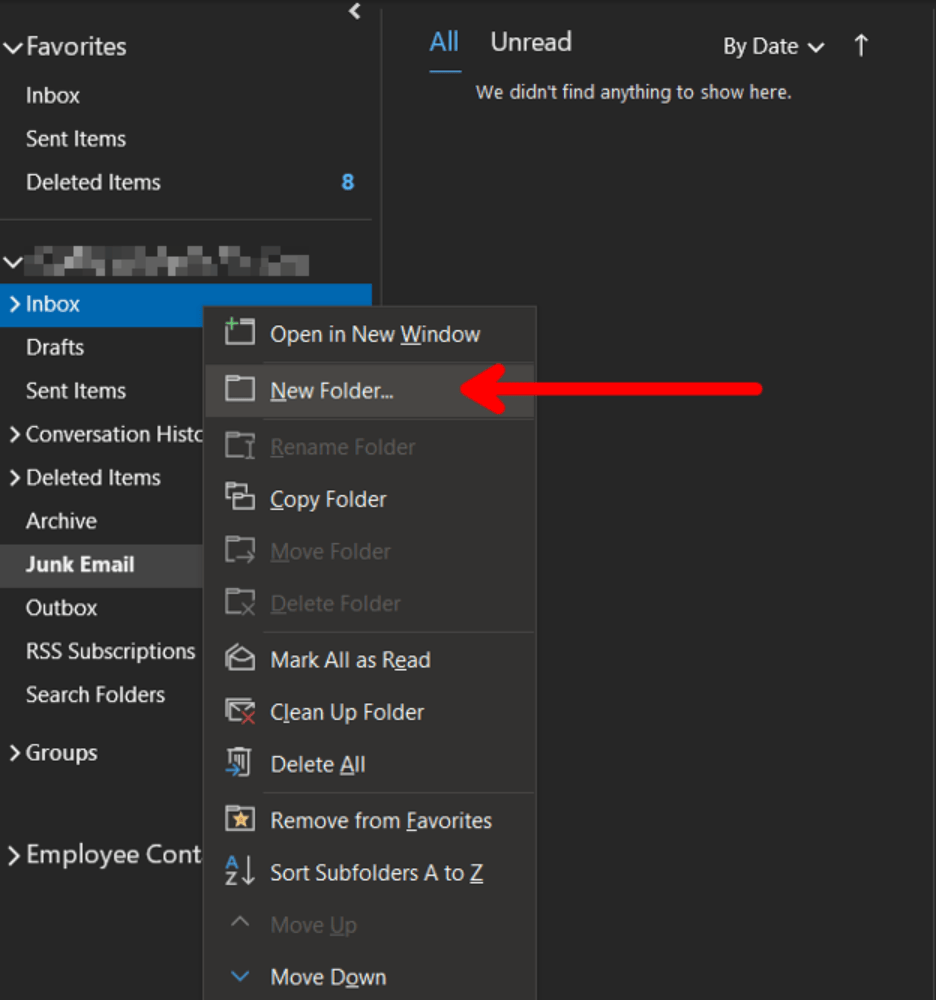
Step 1: Create Project Folders
- Right-click on the “Inbox” folder and select “New Folder” from the context menu
- Name the folder in line with the name of the project
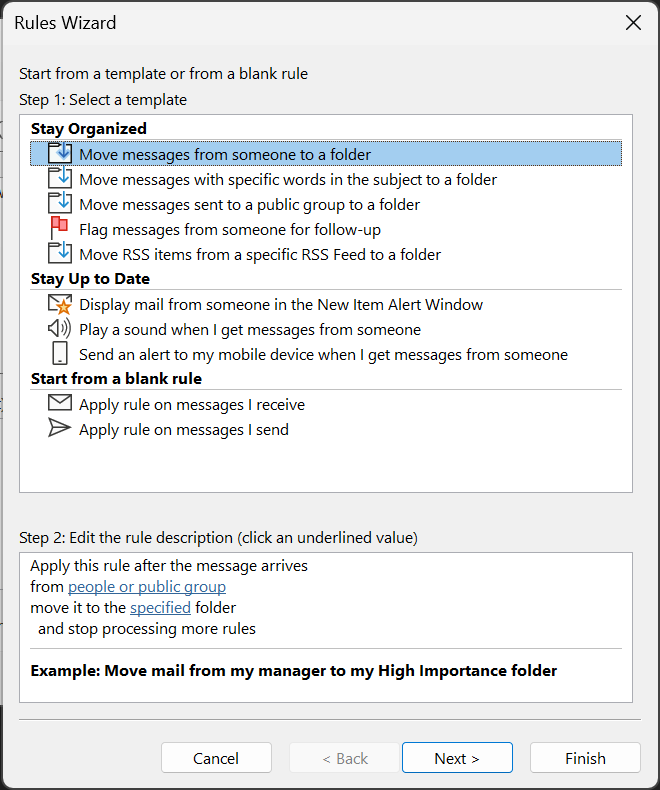
Step 2: Setting the rules
To set outlook rules, go to File > Info > Manage Rules and Alerts
Select New Rule
Here we can see a group of helper templates to quickly create a rule. In our case, we want to automatically move messages based on the email subject. We selected the template “Move messages with specific words in the subject to a folder”
In the “Step 2” section, you will see two links: “specific words” and “specified”
Specific Words: Click the link to customize the word the rule should look for to categorize the email, in our case project name
Specified: Open the Inbox folder dropdown and select the corresponding folder
In the next section, you can customize the action. You can add custom alerts, automatically mark the email as read, and much more depending on your use case
The next section contains exceptions which can be added, let’s say emails from your manager remain in the inbox for quick access
Next, you name the rule and turn it on to enable it within outlook


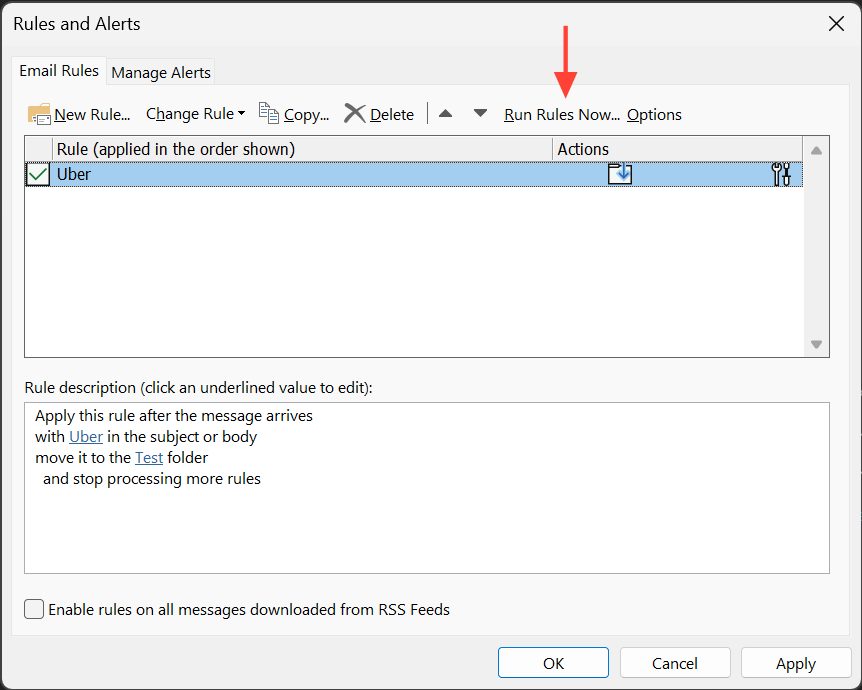
Step 3: Running the rules on current inbox
- In the manage rules dialogue box, you can now see a list of rules created. On the top right, there is a “Run Rules Now” option. This option allows you to execute the rule on your current inbox to sort them in the project folders. From this point onwards however, the rule will run automatically
💡 Bonus Tip
- A good tip and best practice that many workplaces use, and in my experience heavily used in the consulting industry, is to always use a specific structure in email subjects, including the project name or client or both to ensure the rule is always triggered
- This will also benefit the email recipient, as it makes it easy for them to identify the project in question
- An example of this is as follows:
- For a project called “Renovation Project” for client “ABC”, if the email is about setting an alignment meeting, the subject of the email can be: ABC Renovation Project | Alignment Meeting
- The email contains the client, the project, and the subject with a clear separator between the project details and the actual subject of the email, in this case setting an alignment meeting
Wrap Up
Hopefully, you’ve learned a thing or two about how to organize emails in Outlook. You can customize this to your heart’s content, including rule conditions and project structure.
Organizing your folders using an automatic system can save time, keep everything nice and tidy, and the bonus tip can ensure the recipient of the email is aware of the exact details of the email while remaining within your set rule conditions.